MENU (menus) TOOLKIT V0.01
Linux Menu Toolkit - Mark Dickinson, 2004
Freeware - Web posted May 2004
1. What is "menus"
2. How to setup the menu environment for use
3. How to define menus
  3.1 Randomly pick an ordinary filename
  3.2 How menus are seperated by sections
  3.3 Run commands
     3.3.1 Dedicated commands (external/fullscreen)
     3.3.2 Single line query/display commands
  3.4 Invoke another menu
  3.5 Invoke an panel
  3.5.1 A static display panel
  3.5.2 A data input panel
  3.6 Menu file syntax, a sample
4. Panels
  4.1 Syntax
  4.2 Processing data entered into panels
5. Invoking a menu system
  5.1 Runnow, the sample files
  5.2 Invoking your own
|
[next section]
1. What is "menus"
|
"menus" is a basic menu system written using nothing
but standard tput calls, simply because I can't be
bothered learning curses.
Its purpose in life is to allow menus to be created
quickly and painlessly for dumb terminals by, in the
simplest case, editing a single file to provide
multiple chaining menus. It allows you to split the
menus into multiple config files if you really want
to make it complicated.
It also supports data input panels, also very simply
created by just designing a panel in "vi" and putting
a few ___ characters where you want the user to be
prompted for input. See section 4.2 for what to do
with the input data.
|
|
This toolkit, while fully functional, is provided
more as a template for you to enhance than as a
final product. Throw in some more borders etc,
have fun with it.
[index] [next section]
2. How to setup the menu environment for use
Designed for simplicity, simply include the directory
you unpacked the toolkit into in the PATH of those
users who will be using any menus.
Then read the rest of the manual, when you get to section
five you can let your users lose.
[prev section] [index] [next section]
3. How to define menus
3.1 Randomly pick an ordinary filename
The menu configuration file is a normal text file you
maintain using vi. You may imbed multiple menus into
this file and happily jump between them.
Unless you have a really good reason (ie: security) you can
quite happily store all themenus for an application into
this single file.
A sample (the sample menu shipped) menu configuration is
shown in section 3.6. The sections between here and there
explain what each menu action type means.
You may imbed comments into the file, if the first
character on the line (in field 1) is # the line will be
treated as a comment line.
3.2 How menus are seperated by sections
Within the menu configuration file you may store multiple
menu screens. This is the recomended configuration.
Each menu is uniquely identifed by a header of the type
[Menu Name]
Yes, shamelessly stolen from the old windows ini files.
A sample of a menu configuration file is provided in
Section 3.6.
The "Menu Name" will be used as the title displayed for the
menu. Every dataline until the next [xxx] section will be
treated as a menu item for the "Menu Name" section.
You may imbed comments into each section, if the first
character on the line (in field 1) is # the line will be
treated as a comment line.
3.3 Run commands
3.3.1 Dedicated commands (external/fullscreen)
There will be a requirement for the menu to invoke external
programs that require user interaction. Examples of this
would be "vi", "top" etc. In these cases you need to let
the menu know it is to run a 'fullscreen' command, done with
the FCMD menu configuration statement below.
FCMD "description" "command"
The "description" is what will be displayed as the menu
option text. The "command parms" will be executed when
the menu option is selected.
No data will be returned to the menu system to be processed.
The user will return to the menu when they exit the external
program being run.
3.3.2 Single line query/display commands
More often will be the requirement to just issue a command
and display the output back to the user. For example "who",
"df -k" etc. In this case just use the CMD statement as below.
CMD "description" "command parms"
The "description is what will be displayed as the menu
option text. The "command parms" will be executed when
the menu option is selected.
The reponse to the command will be displayed to the user
and piped through "more".
The user will return to the menu system when the data
in the response is exhausted.
3.4 Invoke another menu
Of couse menus would get crowded if you had every single
option on the one screen (well you couldn't fit them on
one screen).
A menu system would be no good if it could not jump to
other menus, so this one does.
To jump to another menu from the current menu use the
configuration file statemeny MENU as below.
MENU "section name" ["menu config file"]
The ["menu config file"] is optional and should seldom
be used. It instructs the menu system to look for the
"section name" in the "menu config file" specified
rather than the current menu configuration file.
By DEFAULT the new menu to be displayed will be located
by "section name" in the currently used menu configuration
file which is the preferred activity unless you have a
pressing reason for doing otherwise.
EXAMPLE 1: MENU "User Menu"
EXAMPLE 2: MENU "Secure Admin Menu" "/opt/secure/adminmenu.menu"
3.5 Invoke an panel
Of course we need panels as well. The toolkit allows both static
panels (such as help screens) and data input panels to be used
with a minimum of effort.
Section 4 covers how to code a panel, this section is how to
invoke one.
3.5.1 A static display panel
A panel file is simply a text file that will be displayed
to the user. Format it as you wish, but avoid use of the
"_" character. See 3.5.2 for why.
To invoke a static panel simply use the menu configuration
statement below.
PANEL "description text" "panel file name"
The "description text" is what will be displayed next to
the menu option. The "panel file name" is the name of the
file that contains your panel text.
Important: It will not just be cat'ed to the screen but
will be preprocessed which will reult in the loss of leading
spaces from each line, so put a . or something at the start
of each line if display postioning is important.
3.5.2 A data input panel
A data input panel is pretty much the same as a normal static
panel with the following exceptions...
a) you are permitted to use the "_" character, defines an input field
b) you must provide a processing script name for the panel
To invoke a data input panel simply use the menu configuration
statement below.
PANEL "description text" "panel file name" "processing script"
As you can see it's pretty much the same as the static panel
display. The "processing script" parameter marks it as a
possible input panel, it will still be checked to ensure it
has at least one input field as designated by the "_"
character before being treated as an input panel.
If you forget the "processing script" parameter or if the
panel file contains no "_" characters it will be processed
as a static panel.
The panel will be parsed to see if there are any "_"
characters on a line, if so the position of the first "_"
on the line will be designated an input field. DO NOT
HAVE MORE THAN ONE INPUT FIELD PER LINE, only the first
will be used.
The user will be required to enter input on each input
field found. When all fields have been entered they will
be prompted to submit, re-enter or cancel the data input.
On submit the "processing script" will be invoked to
process the data the user has entered.
Section 4.2 explains how to process data
entered into a panel.
3.6 Menu file syntax, a sample
This is a sample menu file, it is the one provided
as a sample in the menus folder.
# sample.menu
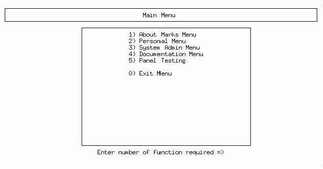
[Main Menu]
CMD "Display disk useage" "df -k"
CMD "Show who is logged on" "who"
MENU "System Admin Menu"
MENU "Panel Testing"
[System Admin Menu]
FCMD "Start Alert Screen" "/opt/dickinson/alert_management/scripts/console.sh"
FCMD "Job Scheduler Interface" "/opt/dickinson/job_scheduler/jobsched_cmd"
CMD "Check last 15 messages entries" "tail -15 /var/log/messages"
CMD "Show personal crontab" "crontab -l"
FCMD "Edit personal crontab" "crontab -e"
[Panel Testing]
PANEL "Static Display Panel" "panels/about_panels.panel"
PANEL "Test Variable Input" "panels/varinput_sample.panel" "panels/varinput_sample.bash"
|
[prev section] [index] [next section]
4. Panels
4.1 Syntax
There isn't really any special syntax required for panel
files other than the basic rules
a) only use the "_" character in data input panels
b) if field placement is important put a . or something
at the start of each line as without a leading character
all leading spaces are stripped off before a panel line
is displayed.
For data input fields the first "_" on each panel line
indicated the start of a user data entry field. ONLY THE
FIRST SUCH FIELD on each line will be recognised as a
data entry field.
|
For example a panel file containing the text
"input field 1: ____ input field 2: _____"
would only prompt for input on the field 1 entry.
You would need
"input field 1: ____"
"input field 2: _____"
(two seperate lines) to get both input fields recognised.
|

|
The panel is displayed as typed into the file (but with
leading spaces removed).
When the user has entered data (or at least hit enter) for all
fields a two line action menu will be displayed at the bottom of the
panel to allow submit, re-enter or cancel for the data, as shown in the
example above.
4.2 Processing data entered into panels
If a panel is defined as a data input panel by having both a
"processing script" and one or more "_" characters indicating
an input field it is up to the "processing script" specified
to process the data fields entered into the panel and to
return data to be displayed to the menu system.
The data passed to a processing script from a data
input panel is
$1 - a logfile to be used to recird output for the
menu to display
$2 - all the data fields provided to the panel as
"field1" "field2" "field3"...
All information that is to be displayed back to the user
invoking the option needs to be written to the logfile.
Only the contents of the logfile as they exist at the end
of the panel processing script will be shown to the user.
A sample data input panel and sample processing script are
provided in the toolkit as panels/varinput_sample.panel and
panels/varinput_sample.bash. Refer to these before creating
your own
.
The basic rules are
a)any output to be displayed to the user must
be written to the logfile.
b)remember all the parameters are in the second
parm passed as quoted stings so extract the real values
with awk as each second parm within ", as...
logfile="$1"
datatoparse="$2"
parm1=`echo "${datatoparse}" | awk -F\" {'print $2'}`
parm2=`echo "${datatoparse}" | awk -F\" {'print $4'}`
parm3=`echo "${datatoparse}" | awk -F\" {'print $6'}`
...etc...
whatever-commands >> ${logfile}
[prev section] [index]
5. Invoking a menu system
5.1 Runnow, the sample files
To run the sample files immediately to see how they perform
use "bash tester.ksh" in the directory you untarred the
toolkit into. This will run the sample menu. It shows the
functionality quite well, and has a usefull RPM lookup
function under the system admin menu as a meaningfull example.
5.2 Invoking your own
As long as you have set the user path statement correctly,
use
'menu.bash "menu config file" "initial section"'
from any script you use to invoke the menu.
OR what I do is have an alias called 'menu' defined which is
alias menu='/opt/dickinson/menus/menu.bash "menus/marks.menu" "Main Menu"'